A window leak often looks simple from inside the room: water appears at the window frame, stains form below the sill, or paint starts bubbling beside the opening. But during a proper window leak inspection in Central Melaka, the entry point is not always the visible wet area. Water may enter through failed sealant, a hairline crack in the wall, a poorly sloped sill, an upper façade defect, or even a penetration near the window before travelling along the wall.
The important question is not just “Which part is wet?” It is “Where did the water first enter the building envelope?”
The Wet Mark Beside the Window Is Only the End Point
When water appears around a window, many owners immediately assume the aluminium frame is leaking. That can be true, especially if the perimeter sealant has hardened, separated from the wall, or was applied over dusty plaster. However, the frame is only one possible pathway.
Water can move behind paint, along cement render, through small gaps at the frame-wall junction, or down from a crack above the window head. By the time the stain appears inside, the water may already have travelled some distance.
A useful inspection starts by separating three locations:
The entry point: where rainwater gets into the wall, frame, or joint.
The travel path: how water moves through the substrate or cavity.
The exit point: where water becomes visible indoors.
For window leakage, repairing only the exit point is one reason repeated sealant patching fails. If the actual entry is a façade crack above the opening, resealing the internal frame edge may only trap moisture inside the wall.
Why Central Melaka Buildings Need Careful External Observation
In Central Melaka, many properties include older terrace houses, shoplots, apartments, hotels, and commercial buildings that have gone through repainting, façade repairs, air-conditioning installation, or window replacement over time. These changes can create mixed materials around the window opening: original cement render, newer patching, aluminium frames, external paint layers, sealants, tiles, and service penetrations.
That mix matters because different materials move and age differently. A rigid cement patch beside a window frame may crack at the joint. Old paint may hide fine render cracks. Sealant may look intact from a distance but have lost adhesion at one edge. A window sill may have been repainted without restoring its fall or drip groove.
For buildings facing open streets, corners, or exposed elevations, wind-driven rain can also push water into small side gaps that stay dry during light rain. This is why a window may leak only during certain storms, not every time it rains.
A window leak inspection should check the wall around the window, not only the window frame. The most common inspection mistake is treating the indoor wet mark as the source. The source may be at the top joint, side jamb, sill, façade crack, screw fixing, weep hole, or nearby penetration, depending on how rainwater reaches the opening.
The Inspection Should Follow the Rainwater Path
A practical inspection does not begin with applying more sealant. It begins with reading how rainwater would move across the exterior surface.
At the top of the window, the inspector checks whether there is a crack, open joint, failed sealant, exposed screw, or missing protection detail above the frame. If water enters at the head, it may run down inside the frame line and appear at either side or at the bottom.
At the side jambs, the concern is usually adhesion and movement. The junction between aluminium frame and masonry must remain sealed while the two materials expand, contract, and move differently. If the sealant is too thin, poorly bonded, or applied over old loose sealant, it may split again after short exposure.
At the sill, drainage becomes the main issue. A sill that slopes inward, holds water, has blocked weep holes, or lacks a drip edge can direct water back toward the frame or wall. Sometimes the sill surface itself is sound, but the side ends of the sill are open, allowing water to enter behind the render.
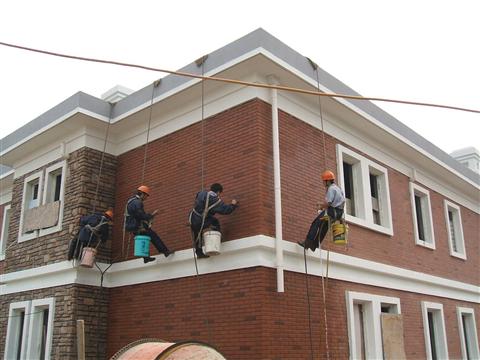
The wall surface around the window also needs attention. Hairline cracks in exterior plaster, hollow render, peeling paint, or efflorescence may indicate that water is entering the wall before reaching the window reveal. If the façade is tiled or stone-clad, joints and hollow areas may become hidden water routes.

Water Testing Must Be Controlled, Not Random Spraying
Many owners test a leak by spraying water at the entire window with a hose. While this may reproduce the leak, it often fails to identify the exact entry point because too many areas are wetted at once.
A more useful water test is staged. The lower sill area is tested first, then the side jambs, then the window head, and finally the surrounding wall above the window if earlier tests do not reproduce the leak. Each stage needs enough time for water to travel, especially when leakage moves through render or a concealed gap.
The sequence matters. If the inspector sprays the entire upper façade first, water may appear inside later, but it becomes unclear whether the leak came from the head joint, a crack above the window, or a side pathway. Controlled testing narrows the diagnosis.
However, water testing should be used carefully. On occupied buildings, excessive spraying can increase internal damage. For high-level windows, access and safety must also be considered. In some cases, visual inspection, moisture mapping, and targeted external checks may be more appropriate before any water test is attempted.
Different Entry Points Lead to Different Repairs
Once the entry point is identified, the repair method should match the defect. This is where many window leak repairs go wrong: every leak is treated as a sealant problem.
If the perimeter sealant has failed but the surrounding wall is sound, removing loose material and resealing the frame-wall junction with a suitable waterproof sealant may be enough. The joint must be clean, dry enough for the product requirements, and properly formed; smearing sealant over dirt, paint flakes, or old cracked sealant is not a durable repair.
If the sill is the problem, the repair may involve correcting the fall, clearing drainage paths, sealing side terminations, or restoring a drip detail. Applying waterproof coating on a flat or inward-sloping sill without correcting water flow may reduce absorption but may not stop ponding-related leakage.
If cracks in the exterior wall are feeding water toward the window, the wall surface itself may need crack treatment and compatible waterproof coating. For example, a transparent exterior wall waterproof coating may be considered when the existing decorative finish must be retained, but only if the substrate is suitable and the coating can bond properly. Loose paint, chalky surfaces, and active cracks need attention first.
If water enters through screw holes, penetrations, air-conditioning pipe openings, or façade fixtures near the window, those details must be sealed directly. Otherwise, the window may continue to be blamed for leakage that is actually entering from a nearby service opening.
When Repeated Window Sealing Does Not Work
A common sign of wrong diagnosis is a window that has been sealed several times but still leaks during heavy or wind-driven rain. This does not always mean the sealant product was poor. It may mean the repair did not address the real entry point or the joint was not prepared correctly.
Repeated patching can also create new problems. Thick layers of sealant over old material may peel as one piece. Internal sealing may block evaporation and keep the wall damp. External coating over trapped moisture may blister. If the frame has weep holes, covering them can prevent the window system from draining as intended.
Before approving another repair, the owner should ask what evidence supports the proposed scope. Was the leak reproduced? Were the head, jambs, sill, wall cracks, and nearby penetrations checked separately? Is the repair targeting the entry point or only the visible stain?
If a window keeps leaking after resealing, the next step should be inspection, not another layer of sealant. The repair should confirm whether water is entering through the frame joint, sill, façade crack, wall coating failure, or nearby penetration. Each cause needs a different repair detail.
What a Proper Window Leak Inspection Should Establish
A useful inspection report or site recommendation should not simply say “window leaking.” It should identify the likely water entry route and explain the repair implication.
For a Central Melaka window leak, the key findings should include whether the leakage is linked to the window frame, surrounding wall, sill drainage, upper façade, penetrations, or a combination of these. The inspection should also consider the substrate condition: sound plaster, loose render, peeling paint, hollow tiles, or contaminated surfaces will affect which waterproofing material can be used.
This matters because the correct repair scope may be small and targeted, or it may require treating a wider wall area. A single failed joint does not need the same solution as a façade with widespread cracking and poor coating adhesion.
Conclusion
A window leak is not solved by guessing where the water appears indoors. The reliable approach is to trace how rainwater reaches the window opening, enters the building envelope, and travels before becoming visible. For properties in Central Melaka, where older façades, repairs, repainting, and service penetrations often exist around windows, that inspection step is especially important.
If you need help identifying the real entry point before carrying out repair work, you can contact QingLong Waterproofing for a site assessment and suitable recommendation.